Lighting is fundamental in any 3D art project you work on. At the most basic level, it’s a way of making objects visible. But cinematographers will tell you how lighting is much more.
Lighting enables you to bring mood to a piece and set the tone. It allows you to subtly manipulate the viewer to look where you want them to. It is also a way to elevate your work out of the 3D realm, giving the warmth of an oil painting or the feel of a photograph.
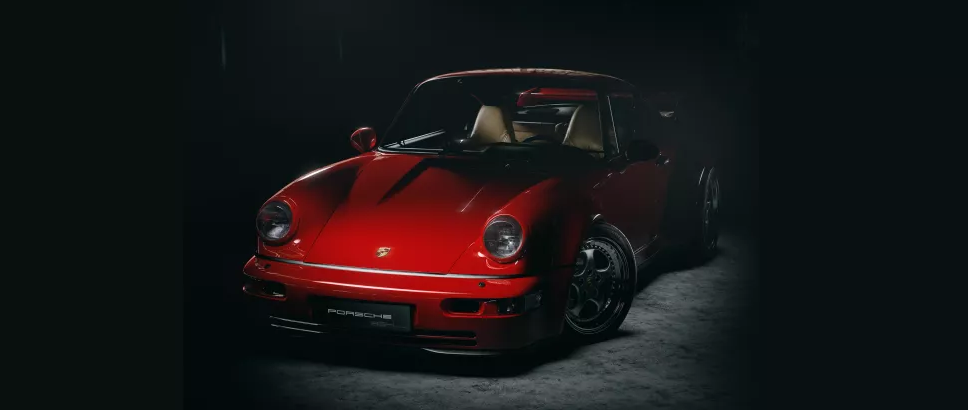
And if you are modelling a real-world object – such as the highly desirable Porsche Legend 964, here – it is essential you get the lighting correct if you are to stand any chance of achieving a photorealistic finish. (If you want to work with this car, download your 140MB resource files here).Read on to discover some key lighting techniques that will quickly improve your work.
Lighting is fundamental in any 3D art project you work on. At the most basic level, it’s a way of making objects visible. But cinematographers will tell you how lighting is much more.
Lighting enables you to bring mood to a piece and set the tone. It allows you to subtly manipulate the viewer to look where you want them to. It is also a way to elevate your work out of the 3D realm, giving the warmth of an oil painting or the feel of a photograph.
And if you are modelling a real-world object – such as the highly desirable Porsche Legend 964, here – it is essential you get the lighting correct if you are to stand any chance of achieving a photorealistic finish. (If you want to work with this car, download your 140MB resource files here).
Read on to discover some key lighting techniques that will quickly improve your work.
- Gather multiple references
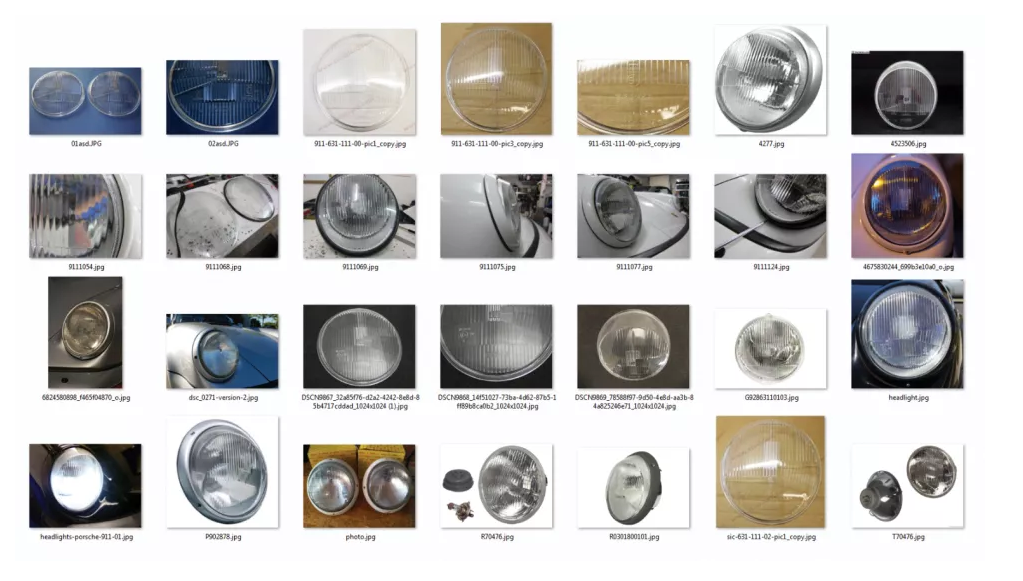
Get your search muscles flexing to find the most suitable references
It doesn’t matter how good you think your visual memory is, don’t attempt any lighting without having a good stock of reference material to work from. If you are modelling something from the real world, find photos of it that you can use.
If this isn’t possible, or you are creating something from your imagination, take your own lighting reference photos. Place an object on a plain surface and against a plain background, light it from one direction and take your photo. Keep moving the light and photographing the result and you will soon have a comprehensive photo reference bank for where to apply highlights and shadows for different light sources.
Do the same with a transparent object, and place more than one object in a scene so you can see how light behaves when it hits multiple objects.
- Use masks to light models
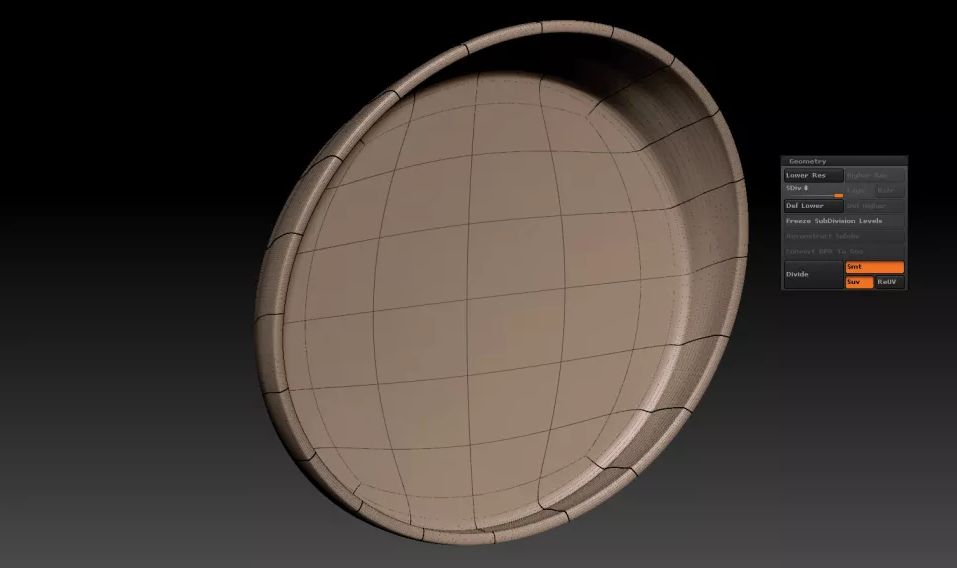
Image 1 of 3 Image created using a simple poly model imported into ZBrushA black-and-white mask made in Photoshop and imported into ZBrushLighting the model using masks only on the parts you needFor this image, I created a low poly model that was as simple as possible. To do this, prepare the UV and then import the model into ZBrush. Make sure that the SUV (Smooth UV) is turned on and then smooth geometry as much as you think is necessary.Now prepare a black-and-white mask in Photoshop and import it into ZBrush as Alpha Mask. After that, use the masks to select only the parts you need. For extruding the details use inflate(Deformation).Prepare a Dome Light setup with an hdri and then check how your model looks. In this example here, I have used a simple material without bump, because all the details came from displacement.
- Build a compelling composition
Effective composition will direct the viewer’s eye where you want
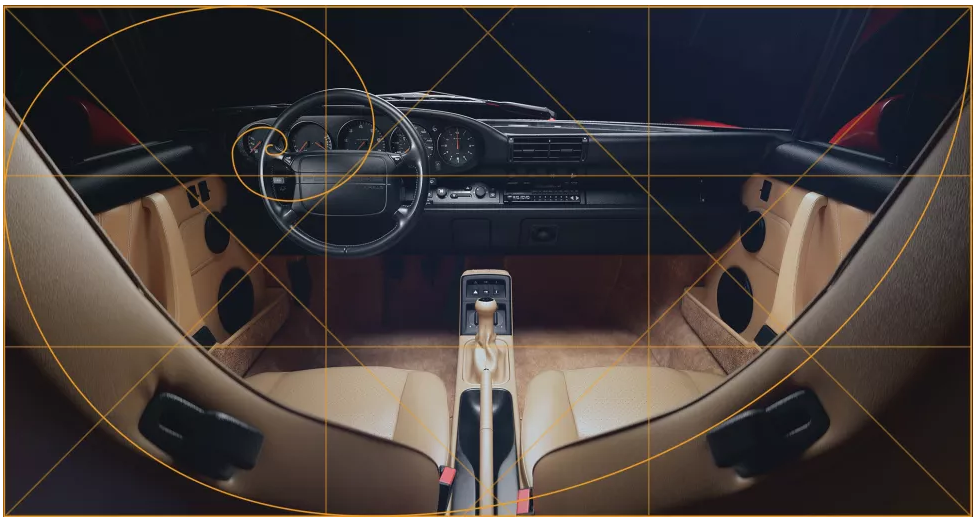
Composition works with lighting when it comes to manipulating the viewer’s eye and directing the attention where you want. The model and textures can be perfect, but if the composition is not good then everything falls into the water. If you are struggling with composition, investigate some traditional art theory. Artists and photographers have devised all sorts of rules for successful composition, from the Rule of Thirds and grid theory to the Golden Ratio (seen here). By knowing the route your viewer’s eye will take, you can then use lighting to work as support for the composition.
- Add drama with strong contrast
Add dynamics with the use of strong contrast
This is an excellent example of how you can focus all the attention on one part of the image by using strong contrast to create a silhouette. In this example, there is also a clear separation of positive and negative space, which helps emulate a high-end photographic quality and to deliver something a bit more interesting and dynamic than just a car model.
- Experiment with lenses
Use light to block as well as draw attention to areas Do not limit yourself to normal lenses (50mm). Instead, combine different lenses, angles, camera movement, speed and duration. The height of the camera can change a lot and give a completely different impression, which in turn will help open new lighting opportunities you might not have considered.
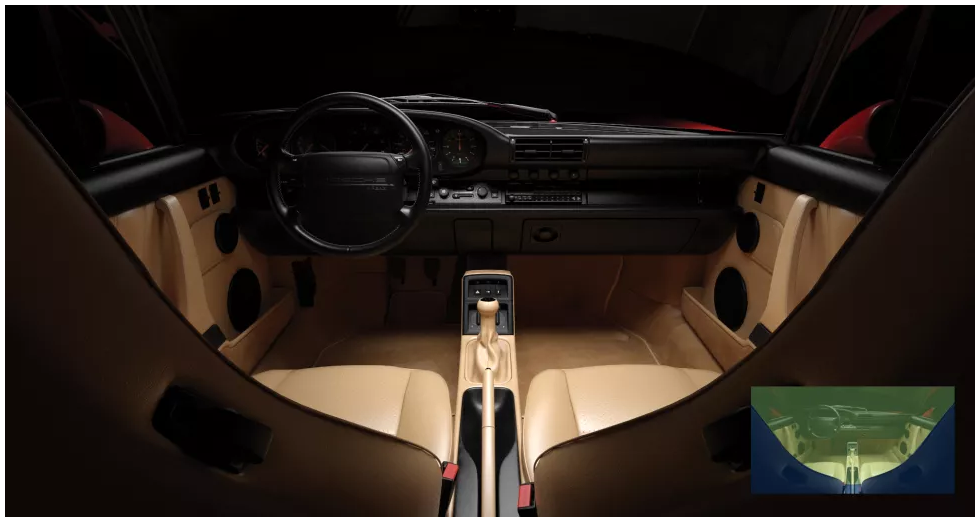
- Position the main light
Advertisement Give the viewer a sense of being thereIf there was no sound in a film, you would be still able to tell a story or convey the atmosphere and mood by using lights and shadows. The main light needs to be positioned well and its shadows need to explain the shape and the structure of the scene. It can additionally influence the composition by separating the positive and negative space.
Here, it would have been easy to fill the interior with light, but by placing the main light where I did, I’ve made it feel as though the viewer is inside the car, peering through the front seats. There is a feeling of depth and the light falling where it does accentuates the materials.
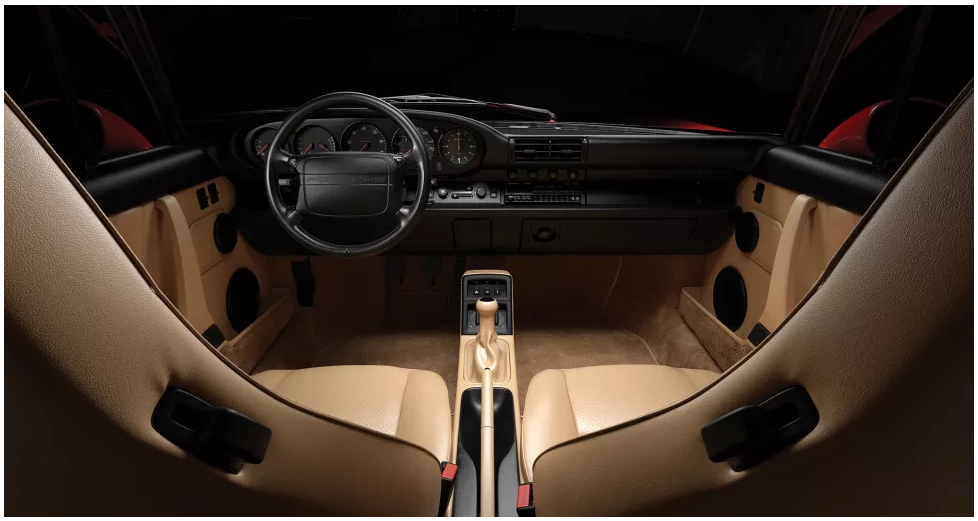
- Build up your light
Build the light in stages for effective composition
Depending on the situation and requirements, adding other lights helps us to fill something else or to justify the bounce of the light.
Try to describe the areas you are lighting as much as possible. It’s best to start out of total darkness. You don’t have always to be guided by a standard ‘hdri’, setup but by clumsy usage you will get ‘washed’ light, which is hard to control. Play with the lights but always have in mind why that particular light is on that particular place.
- Clean up in compositing
Advertisement A composite image brings all elements togetherCompositing is the last phase of an image and allows you to quickly and easily combine many different layers, to influence the contrast, colour, depth of field, motion blur, lens breathing and everything else that’s necessary to make your picture look like it was filmed with a movie camera.It is necessary to be aware that some things are easier left for the compositing stage, rather than wasting your time trying to do it in 3D. For example, in the render above we can clearly see the reflection of the wheel on the door, which needs to be removed. The plan is to paint out the spotlight on the floor below the wheel, to increase the highlight on the rear tyre and to generally reduce the highlights.
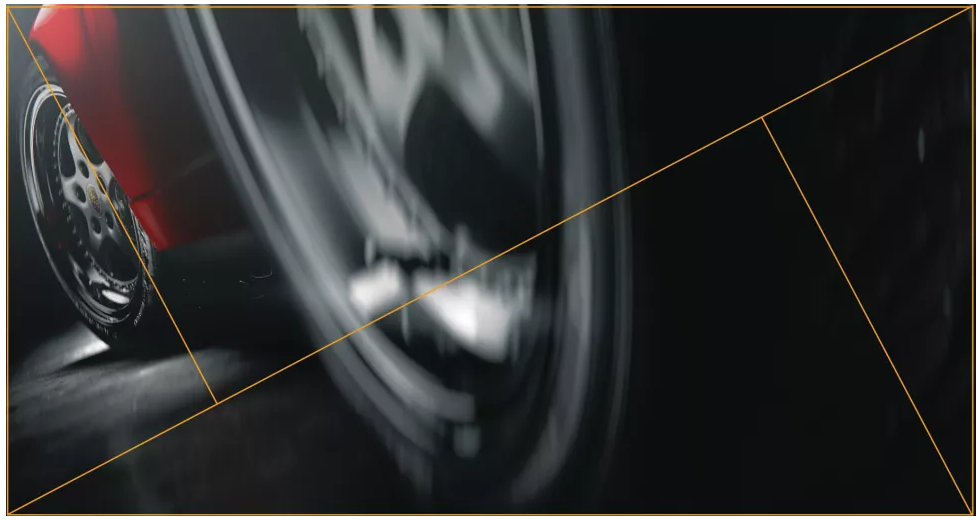
- Use effects to direct the viewer’s gaze
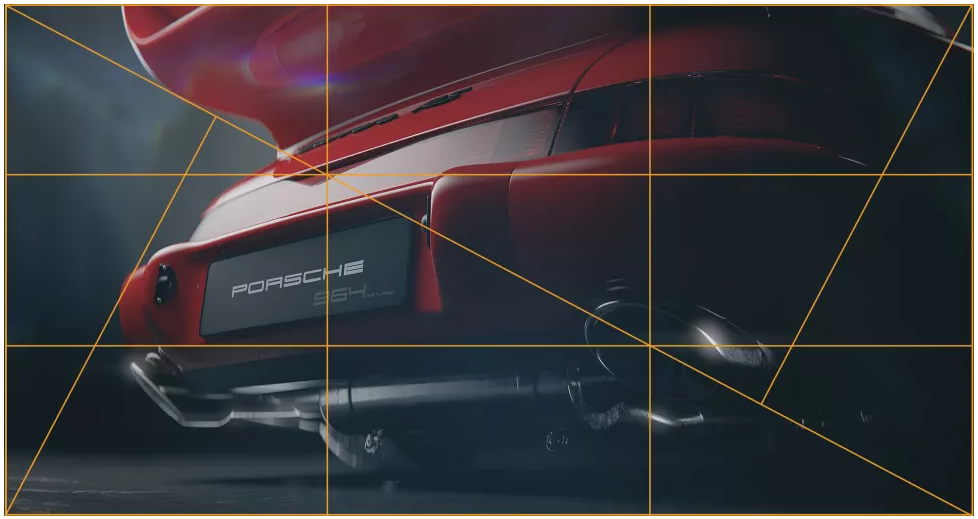
Image 1 of 2 Use lines to map out desired focal points Bokeh effects applied using the lines guide the gaze of the viewerUse lines to map out desired focal pointsBokeh effects applied using the lines guide the gaze of the viewerIt’s really tempting to get carried away with shiny light effects such as bokeh and glow, but use them too much and all you do is lose any kind of impact. Restrict these to strong highlights on certain parts of the image, such as metal and glass, in addition to any strong light sources.
Although this image is only a section of the Porsche, attention is drawn towards a diagonal slice in the middle, thanks to the glow and bokeh effects. I began by using lines to work out the composition of the image, and then applied the effects following those lines.
- Add selective highlights

Advertisement
Well placed highlights help convey depth of field Using photographic techniques, such as a shallow depth of field, is a useful way of drawing attention to an area, but highlights can also help achieve the same result. The problem with a shallow depth of field is that all of the in-focus detail is right at the front of the image, so the viewer can find it difficult to know where to look. In our example above, highlights are used to pick out the texture on the headlight and Porsche logo. Not only does this give a tactile quality to the image, but it helps stop the image looking flat.
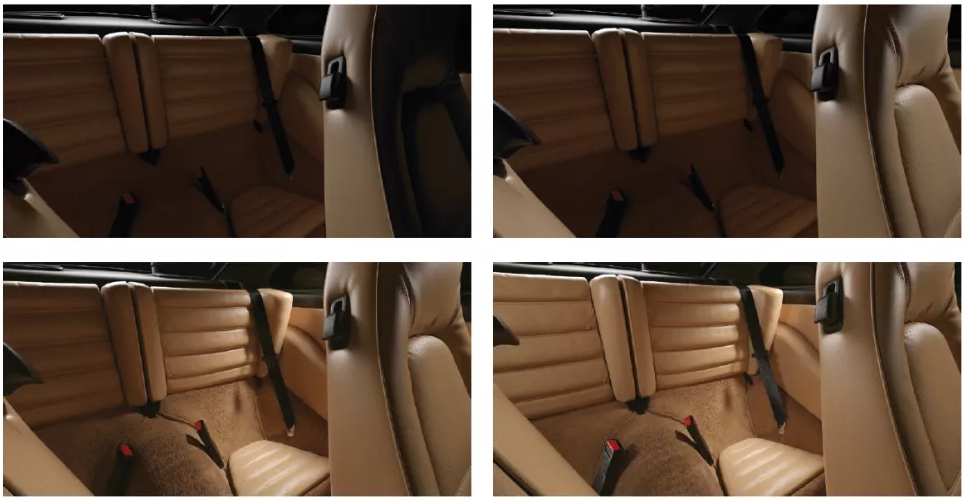
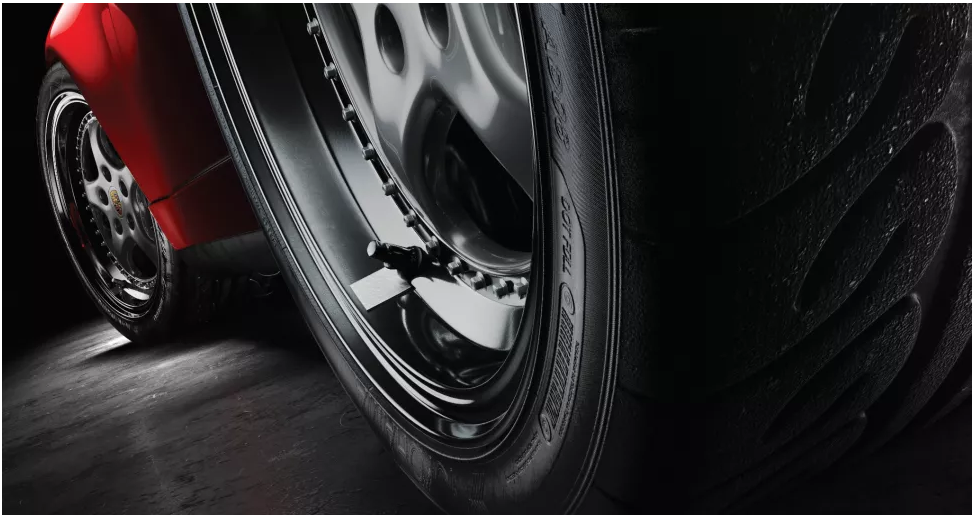
- Light multiple materials

Try different light sources to accentuate textures or details Play with the angle of the source light to make the most of textures. The lighting in this image is placed to accentuate the textures. If it was placed in a different position, some of this detail would have been lost. When you are aiming for photorealism, it is by emphasising recognisable elements that you will achieve your goal.
- Light a scene
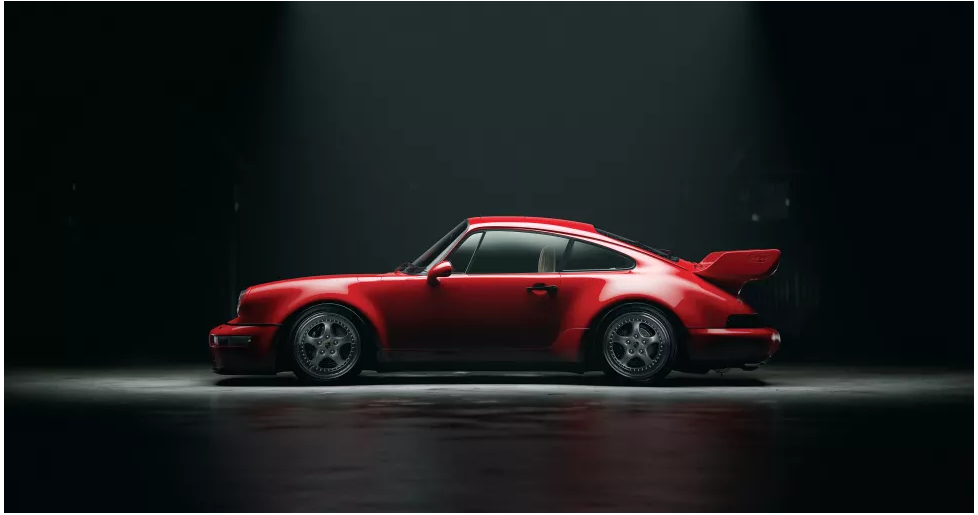
Advertisement Think about how it would look in a real-life setting Of course at its most basic, lighting is a way of setting the scene for your image. If you are dealing with a real-world object, think about how lighting might be used in a real-life setting.For example, motor shows will often use dark backgrounds, with a strong spotlight on the car being unveiled. It isn’t complicated, but it is a recognisable setup, and will therefore aid in making your image feel believable.